

本章主要介绍如何配置云端图床可上传事项
- https://cloudinary.com/ 进入注册
- 进入Dashboard -> CloudName -> 你可以查看到你的额度和相关信息
- https://next.cloudinary.dev/installation ->此处详细指导了你如何在nextjs中使用cloudinary
- npm install next-cloudinary
- .env -> 增加环境变量(在Dashbord中你可以找到这个字段):NEXT_PUBLIC_CLOUDINARY_CLOUD_NAME=”<Your Cloud Name>”
- 书写使用代码:
import { CldUploadWidget } from "next-cloudinary";
import Image from "next/image";
import { useCallback } from "react";
import { TbPhonePlus } from "react-icons/tb";
declare global {
var cloudinary: any;
}
interface ImageUploadProps {
onChange: (value: string) => void;
value: string;
}
const ImageUpload: React.FC<ImageUploadProps> = ({ onChange, value }) => {
const handleUpload = useCallback(
(result: any) => {
onChange(result.info.secure_url);
},
[onChange]
);
return (
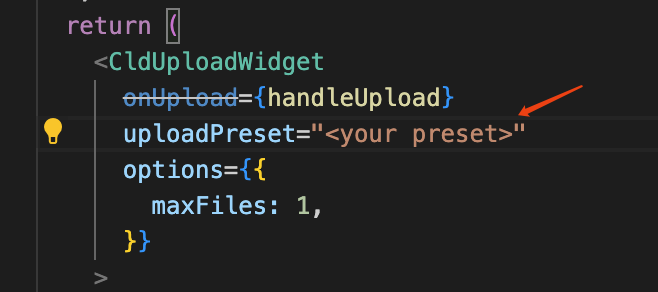
<CldUploadWidget
onUpload={handleUpload}
uploadPreset="<your preset>"
options={{
maxFiles: 1,
}}
>
{({open}) => {
return (
<div
onClick={() => open?.()}
className="relative cursor-pointer hover:opacity-70 transition border-dashed border-2 p-20 border-neutral-300 flex flex-col justify-center items-center gap-4 text-neutral-600"
>
<TbPhonePlus size={50}></TbPhonePlus>
<div className="font-semibold text-lg">
Click to upload
</div>
{value && (
<div className="absolute inset-0 w-full h-full">
<Image alt="Upload" fill style={{objectFit:"cover"}} src={value}/>
</div>
)}
</div>
);
}}
</CldUploadWidget>
);
};
export default ImageUpload;
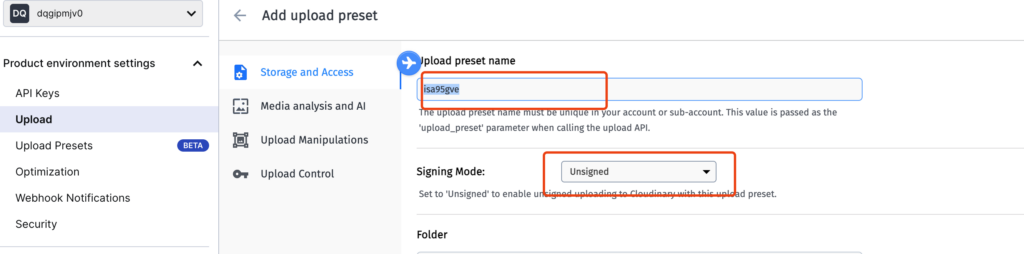
- 在https://cloudinary.com/ -> setting->upload ->Upload presets ->Add upload preset ->Signing Mode:unsigned.并将“Upload preset name”的值拷贝到代码中的:uploadPreset中
- 将cloudinary的域名放入next.config.mjs的remotePatterns中用于定义
next/image组件允许的远程映像模式:
/** @type {import('next').NextConfig} */
const nextConfig = {
    images:{
        remotePatterns: [
            {
              protocol: 'https',
              hostname: 'avatars.githubusercontent.com',
            },
            {
              protocol: 'https',
              hostname: 'lh3.googleusercontent.com',
            },
            {
              protocol: 'https',
              hostname: 'res.cloudinary.com',
            }
          ],
    }
};
export default nextConfig;
4、效果:
现在所有的前置操作已经完成,接下来看看效果